nagiosでフリーな監視をしてみよう!~nagiosの設定(6)~
監視対象の状態を監視する設定(ディスク空き状況)
次に、ディスク空き状況の設定について紹介します。
使用するコマンドは、「check_disk」を使用します。
「check_disk」は、「/usr/local/nagios/etc/objects/commands.cfg」ファイルの中に「check_load」と同様に記述されています。
設定例として、「/」を割り当てているパーティションの空き容量が「10%」で「WARNING」、「5%」で「CRITICAL」とします。
(1)監視対象側にて、「nrpe.cfg」ファイルの設定を変更します。
・「/usr/local/nagios/etc/nrpe.cfg」ファイル変更前の内容
 command[check_users]=/usr/local/nagios/libexec/check_users -w 5 -c 10
 #command[check_load]=/usr/local/nagios/libexec/check_load -w 15,10,5 -c 30,25,20
 command[check_hda1]=/usr/local/nagios/libexec/check_disk -w 20% -c 10% -p /dev/hda1
 command[check_zombie_procs]=/usr/local/nagios/libexec/check_procs -w 5 -c 10 -s Z
 command[check_total_procs]=/usr/local/nagios/libexec/check_procs -w 150 -c 200

 command[check_load]=/usr/local/nagios/libexec/check_load -w 2.0,2.0,2.0 -c 4.0,4.0,4.0
・「/usr/local/nagios/etc/nrpe.cfg」ファイル変更後の内容
 command[check_users]=/usr/local/nagios/libexec/check_users -w 5 -c 10
 #command[check_load]=/usr/local/nagios/libexec/check_load -w 15,10,5 -c 30,25,20
 #command[check_hda1]=/usr/local/nagios/libexec/check_disk -w 20% -c 10% -p /dev/hda1
 command[check_zombie_procs]=/usr/local/nagios/libexec/check_procs -w 5 -c 10 -s Z
 command[check_total_procs]=/usr/local/nagios/libexec/check_procs -w 150 -c 200

 command[check_load]=/usr/local/nagios/libexec/check_load -w 2.0,2.0,2.0 -c 4.0,4.0,4.0
 command[check_disk]=/usr/local/nagios/libexec/check_disk -w 10% -c 5% -p /
(2)監視対象側にて、「nagios2.cfg」ファイルの設定を変更します。
・「nagios2.cfg」ファイル変更後の内容
 define service{
     use                 generic-service
     host_name           nagios2
     service_description Root Partition
     check_command       check_nrpe!check_disk
     }
(3)監視サーバ側にて、設定を反映します。
# service nagios reload
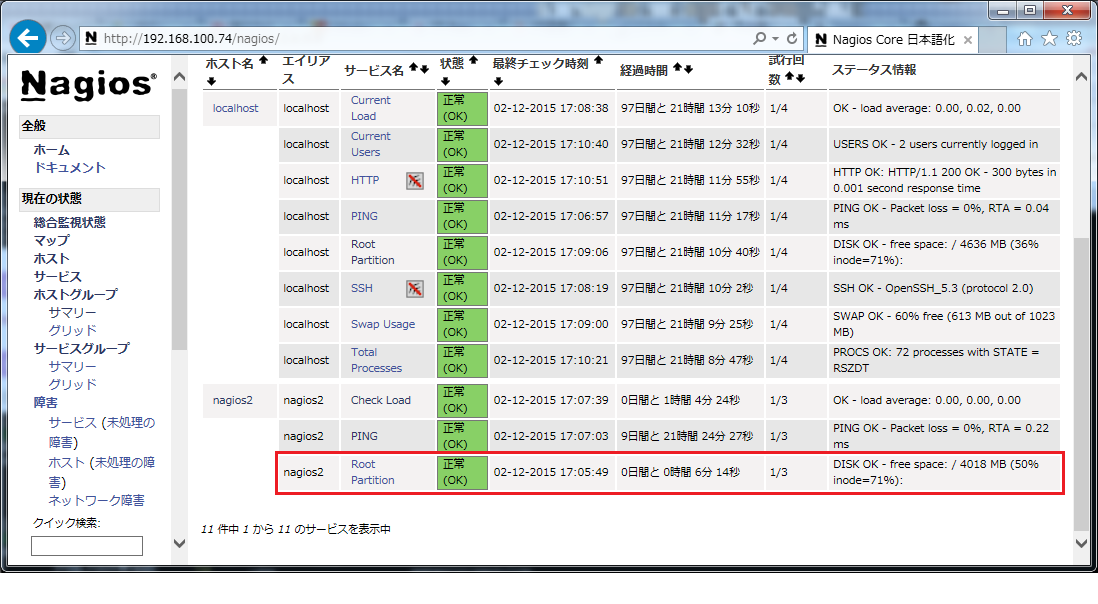
(4)「http://(サーバのIP)/nagios/」を開いて、左側の「現在の状態(Current Status)」-「サービス(services)」をクリックし、しばらくすると、「正常(OK)」となります。
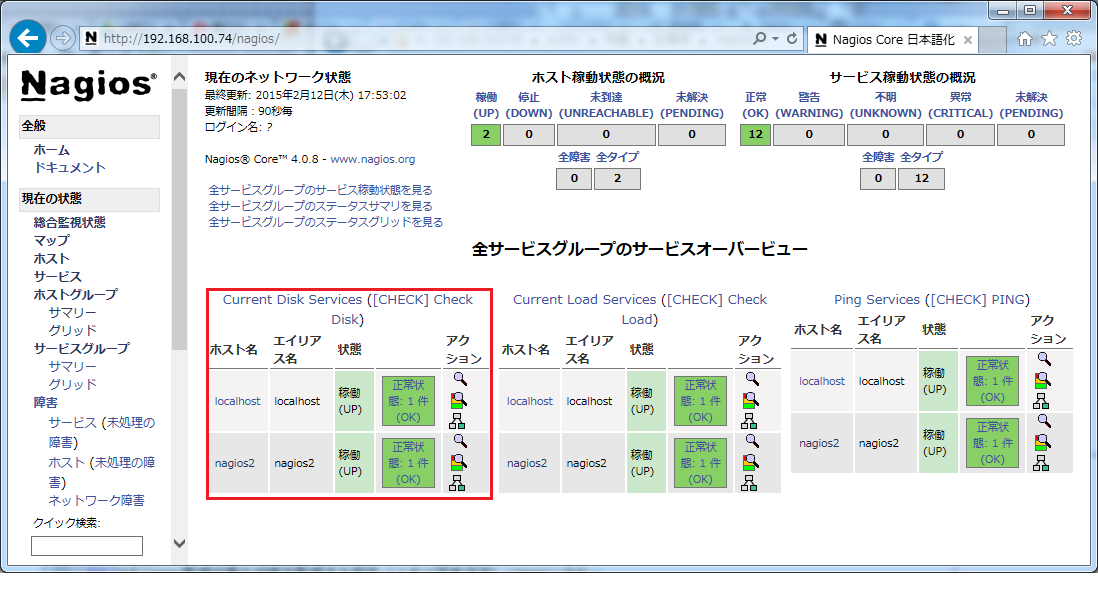
(5)サービスグループにも表示させるために、「servicegroup.cfg」ファイルの設定を変更します。
・「servicegroup.cfg」ファイル変更後の内容
 define servicegroup{
     servicegroup_name   [CHECK] Check Disk
     alias               Current Disk Services
     members             localhost,Root Partition
     members             nagios2,Root Partition
 }
(6)監視サーバ側にて、設定を反映します。
# service nagios reload
(7)「http://(サーバのIP)/nagios/」を開いて、左側の「現在の状態(Current Status)」-「サービスグループ(service group)」をクリックし、しばらくすると、「Current Disk Services ([CHECK] Check Disk)」が表示されます。