内部保存域
内部保存域とはデバイスメモリの事で、OS(Android)がインストールされている場所です。内部保存域に保存したデータはデフォルトでは他のアプリケーションからアクセスすることはできません。プリファレンスと同様にroot化された端末では、他のアプリケーションからアクセスすることが可能となります。エミュレータでも可能です。
内部保存域の保存先は「data/data/パッケージ名/files/」です。
保存されたデータはアプリケーションを削除すると、すべて破棄されます。
それでは以下のコードを確認してください。
データを書き込む場合
String fname = "hello_file";
FileOutputStream fos = openFileOutput(fname, Context.MODE_PRIVATE);
2行目のopenFileOutput()の第1引数で書き込みを行うファイル名を指定します。ここでは1行目で用意したString型のfnameという変数に代入している「hello_file」を指定しています。openFileOutput()の戻り値には、FileOutputStreamクラスのインスタンス(java.io.FileOutputStream オブジェクト)が返されます。このオブジェクトを使えば文字データやバイナリデータをファイルに書き込むことができます。
また、openFileOutput()の第2引数は共有モードで以下の値を指定します。
| 定数名 | 概要 |
|---|---|
| MODE_WORLD_READABLE | 他のアプリケーションから読み取り可能 |
| MODE_WORLD_WRITEABLE | 他のアプリケーションから書き込み可能 |
| MODE_PRIVATE | 他のアプリケーションからアクセス不可 |
データを読み込む場合
String fname = "hello_file";
FileInputStream fis = openFileInput(fname);
2行目でファイル名を指定して、読み込むファイルを展開しています。
openFileOutput()と異なり、引数は1つです。
openFileInput()の戻り値には、FileInputStreamクラスのインスタンス(java.io.FileInputStream オブジェクト)が返されます。このオブジェクトを使えば文字データやバイナリデータをファイルから読み込むことができます。
activity_main.xml(レイアウトファイル)
<LinearLayout xmlns:android="http://schemas.android.com/apk/res/android"
xmlns:tools="http://schemas.android.com/tools"
android:layout_width="match_parent"
android:layout_height="match_parent"
android:orientation="vertical"
tools:context=".MainActivity" >
<TextView
android:id="@+id/textView1"
android:layout_width="match_parent"
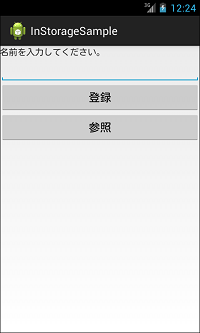
android:layout_height="wrap_content"
android:text="名前を入力してください。" />
<EditText
android:id="@+id/editText1"
android:layout_width="match_parent"
android:layout_height="wrap_content" />
<Button
android:id="@+id/button1"
android:layout_width="match_parent"
android:layout_height="wrap_content"
android:text="登録" />
<Button
android:id="@+id/button2"
android:layout_width="match_parent"
android:layout_height="wrap_content"
android:text="参照" />
</LinearLayout>
MainActivity.java(Activityファイル)
package com.example.instoragesample;

import java.io.FileInputStream;
import java.io.FileOutputStream;
import java.io.IOException;

import android.app.Activity;
import android.content.Context;
import android.os.Bundle;
import android.view.View;
import android.view.View.OnClickListener;
import android.widget.Button;
import android.widget.EditText;
import android.widget.Toast;

public class MainActivity extends Activity {

	private String frame = "hello_file";

	@Override
	protected void onCreate(Bundle savedInstanceState) {
		super.onCreate(savedInstanceState);
		setContentView(R.layout.activity_main);

		Button button1 = (Button) findViewById(R.id.button1);
		button1.setOnClickListener(new OnClickListener() {

			@Override
			public void onClick(View v) {
				EditText editText = (EditText) findViewById(R.id.editText1);
				String str = editText.getText().toString();

				FileOutputStream fos = null;

				try {
					fos = openFileOutput(frame, Context.MODE_PRIVATE);
					fos.write(str.getBytes());
					Toast.makeText(MainActivity.this, str + "さんを登録しました。", Toast.LENGTH_SHORT).show();

				} catch (IOException e) {
					e.printStackTrace();
					Toast.makeText(MainActivity.this, "登録できませんでした。", Toast.LENGTH_SHORT).show();

				} finally {

					try {
						if (fos != null)
							fos.close();
					} catch (IOException e) {
						e.printStackTrace();
					}
				}
			}
		});

		Button button2 = (Button) findViewById(R.id.button2);
		button2.setOnClickListener(new OnClickListener() {

			@Override
			public void onClick(View v) {
				FileInputStream fis = null;

				try {
					fis = openFileInput(frame);
					byte buffer[] = new byte[100];
					fis.read(buffer);
					String str = new String(buffer).trim();
					Toast.makeText(MainActivity.this, str + "さんが登録されています。", Toast.LENGTH_SHORT).show();

				} catch (IOException e) {
					e.printStackTrace();
					Toast.makeText(MainActivity.this, "読み込みに失敗しました。。", Toast.LENGTH_SHORT).show();

				} finally {

					try {
						if (fis != null)
							fis.close();
					} catch (IOException e) {
						e.printStackTrace();
					}

				}

			}
		});
	}

}
このサンプルコードではButtonを2つ設置しています。
1つ目はEditTextに入力した内容を登録する為のButtonで、2つ目は保存されているデータを呼び出すためのButtonです。
- データの書き込み処理
- データの読み込み処理
36行目でデータを書き込むファイル名と共有モードを指定しています。
37行目でEditTextに入力された内容を、String型に変換し、write()で書き込み処理を行っています。
write()の引数はbyte型の配列なので、getBytes()でString型の文字列をbyte型の配列に変換しています。
write(byte[] b)
最後に48行目でFileOutputStremを閉じて終了となります。
64行目で読み込みたいデータが入っているファイル名を指定しています。
65行目では、byte型の配列であるbuffer[]を用意していますが、これは66行目のread()が、読み込んだデータをそのままbyte配列にコピーしてくれるからです。
read(byte[] b)
67行目でString型に変換していますが、ここでのtrim()は文字列の先頭または最後に空白が付いている際に、それを削除するためのメソッドです。
最後に78行目でFileInputStremを閉じて終了となります。
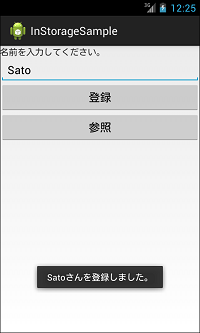
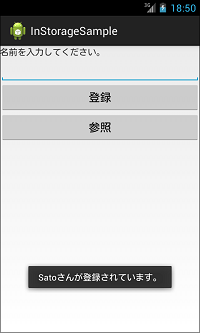
上記サンプルコードは、名前を入力し登録ボタンをクリックすると下図の2枚目のようになります。また、参照ボタンをクリックすると下図の3枚目のようになります。
エミュレータの下記フォルダにhello_fileという名前のファイルが作成されます。
「data/data/com.example.instoragesample/files/」
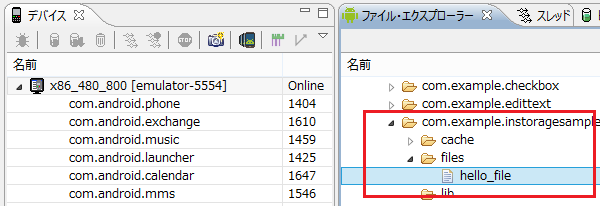
出力したファイルを展開すると、登録した「Sato」が保存されているのが確認できます。
Sato
以上が内部保存域の保存方法です。
Androidアプリ開発の必須知識!JAVAプログラミングを学べる連載リンク


Recent News
-
 2023.04.28セキュリティソリューション事業部からのお…
 -
2023.04.28セキュリティエンジニアが気になったニュー…
-
2023.04.21セキュリティエンジニアが気になったニュー…
-
2023.04.12セキュリティエンジニアが気になったニュー…
-
2023.04.07セキュリティエンジニアが気になったニュー…
Recent Tips
-
 2021.08.31SQLの概要
 -
 2020.06.25【Java Silver】モジュールシス…
 -
2020.06.20【Java】Integer.parseI…
-
2020.06.15【Java Silver】モジュールシス…
-
 2020.06.04世界を支える数学~公開鍵暗号方式~
Tag Search
- 基本(503)
- 練習問題(456)
- プログラミング(449)
- サンプル(332)
- JAVA(301)
- 初心者(288)
- PHP(237)
- Linux(214)
- Android(194)
- アプリ(162)
- 環境構築(159)
- JAVA練習問題(143)
- サーバ(135)
- Unity(134)
- CCNA(132)
- インストール(111)
- iPhone(102)
- C言語(100)
- Xcode(93)
- TIPS(91)
- VBA(83)
- PHP練習問題(80)
- Excel(79)
- Swift(77)
- コラム(75)
- コマンド(72)
- ICND1(72)
- SQL練習問題(72)
- 無料(67)
- ICND2(63)
- セキュリティ(58)
- Apache(57)
- ネットワーク(56)
- JAVA8(51)
- JavaScript(50)
- CCNP(50)
- java8練習問題(48)
- ツール(47)
- 難易度:★なし(47)


