カレンダーをCalDAVクライアントで管理しよう(CalDAV/DAViCALの構築)②
カレンダーをCalDAVクライアントで管理しよう(CalDAV/DAViCALの構築)②
「CalDavZAP(Webクライアント)」の概要
今回は、「CalDavZAP(Webクライアント)」について、紹介していきたいと思います。
「CalDavZAP(Webクライアント)」は、jQuery/JavaScriptで開発されています。
しかし、「CalDavZAP(Webクライアント)」は、Webアプリとなるため、予め、Webサーバが必要となります。
[note]
・OS:CentOS-5.9
⇒windowsでも、LinuxでもWebサーバが設置できるところであれば、問題なし。
・Webサーバ:apache http server
⇒http文書が公開できるサーバであれば問題なし。
[/note]
「CalDavZAP(Webクライアント)」のダウンロード
まずは、apacheがインストールされているサーバに接続し、ソースをダウンロードします。
cd /usr/local/src
wget http://www.inf-it.com/CalDavZAP_0.9.1.2.zip
・本家サイト
http://www.inf-it.com/open-source/clients/caldavzap/
「CalDavZAP(Webクライアント)」のインストール
「CalDavZAP」の解凍をし、ドキュメントルートに配置します。
unzip CalDavZAP_0.9.1.2.zip
ls -l caldavzap
mv caldavzap /usr/local/apache2/htdocs/
※apacheのドキュメントルートは、ここでは「/usr/local/apache2/htdocs」とします。
「CalDavZAP(Webクライアント)」の設定
caldavzapディレクトリ配下の「config.js」ファイルを開き、59行目を修正します。
cd /usr/local/apache2/htdocs/caldavzap/
vi config.js
・変更前
//var globalNetworkCheckSettings={href: 'http://davical.server.com:8080/caldav.php/', hrefLabel: null, crossDomain: n        ull, additionalResources: [], forceReadOnly: null, withCredentials: false, showHeader: true, settingsAccount: true, s        yncInterval: 60000, timeOut: 30000, lockTimeOut: 10000, delegation: false, backgroundCalendars: [], ignoreAlarms: fal        se}
// Davical example (client installed into Davical subdirectory - works out of the box, no additional setup required):
var globalNetworkCheckSettings={href: location.protocol+'//'+location.hostname+(location.port ? ':'+location.port: ''        )+location.pathname.replace(RegExp('/+[^/]+/*(index.html)?$'),'')+'/caldav.php/', hrefLabel: null, crossDomain: null        , additionalResources: [], forceReadOnly: null, withCredentials: false, showHeader: true, settingsAccount: true, chec        kContentType: true, syncInterval: 60000, timeOut: 30000, lockTimeOut: 10000, delegation: false, ignoreAlarms: false,         backgroundCalendars: []}
・変更後
//var globalNetworkCheckSettings={href: 'http://davical.server.com:8080/caldav.php/', hrefLabel: null, crossDomain: n        ull, additionalResources: [], forceReadOnly: null, withCredentials: false, showHeader: true, settingsAccount: true, s        yncInterval: 60000, timeOut: 30000, lockTimeOut: 10000, delegation: false, backgroundCalendars: [], ignoreAlarms: fal        se}
// Davical example (client installed into Davical subdirectory - works out of the box, no additional setup required):
var globalNetworkCheckSettings={href: location.protocol+'//'+location.hostname+'/davical/caldav.php/', hrefLabel: null, crossDomain: null        , additionalResources: [], forceReadOnly: null, withCredentials: false, showHeader: true, settingsAccount: true, chec        kContentType: true, syncInterval: 60000, timeOut: 30000, lockTimeOut: 10000, delegation: false, ignoreAlarms: false,         backgroundCalendars: []}
※caldavサーバのドキュメントルートに合わせてください。
「CalDavZAP(Webクライアント)」の確認
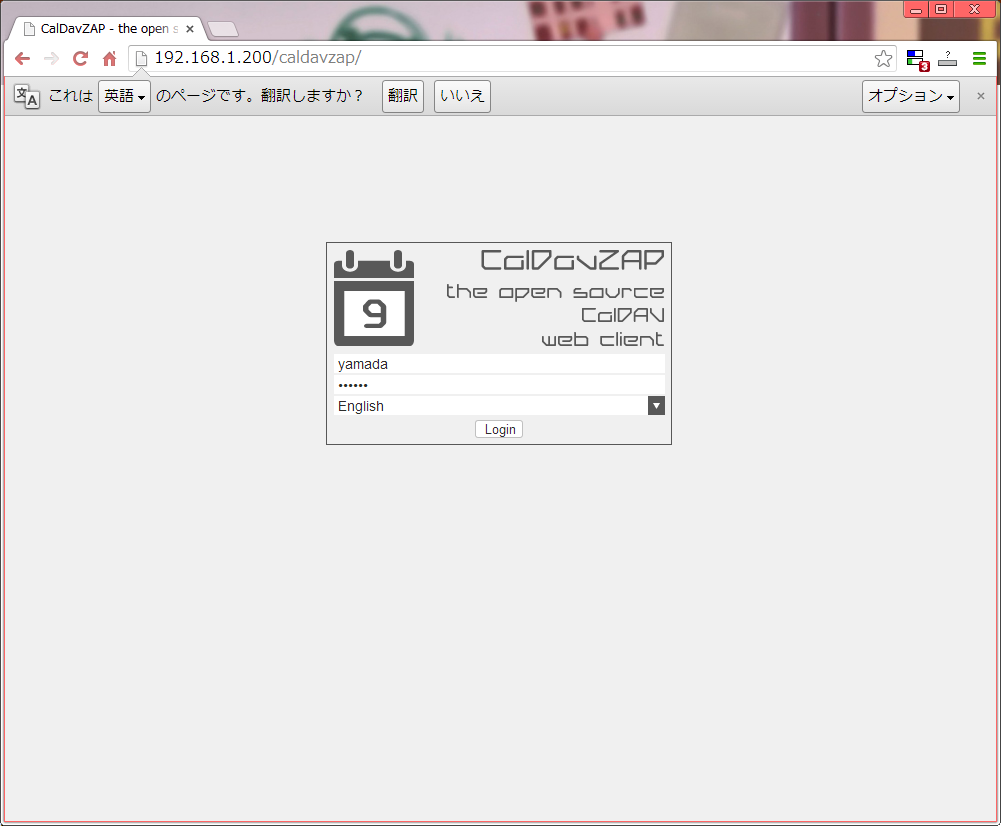
①ブラウザを開き、「CalDavZAP」にアクセスします。
・URL
⇒http://[サーバドメイン名]もしくは[サーバIP]/caldavzap/
※ユーザー名・パスワードは、個別で確認してください。

②ユーザー名・パスワードを入力後、[Login]ボタンをクリックします。
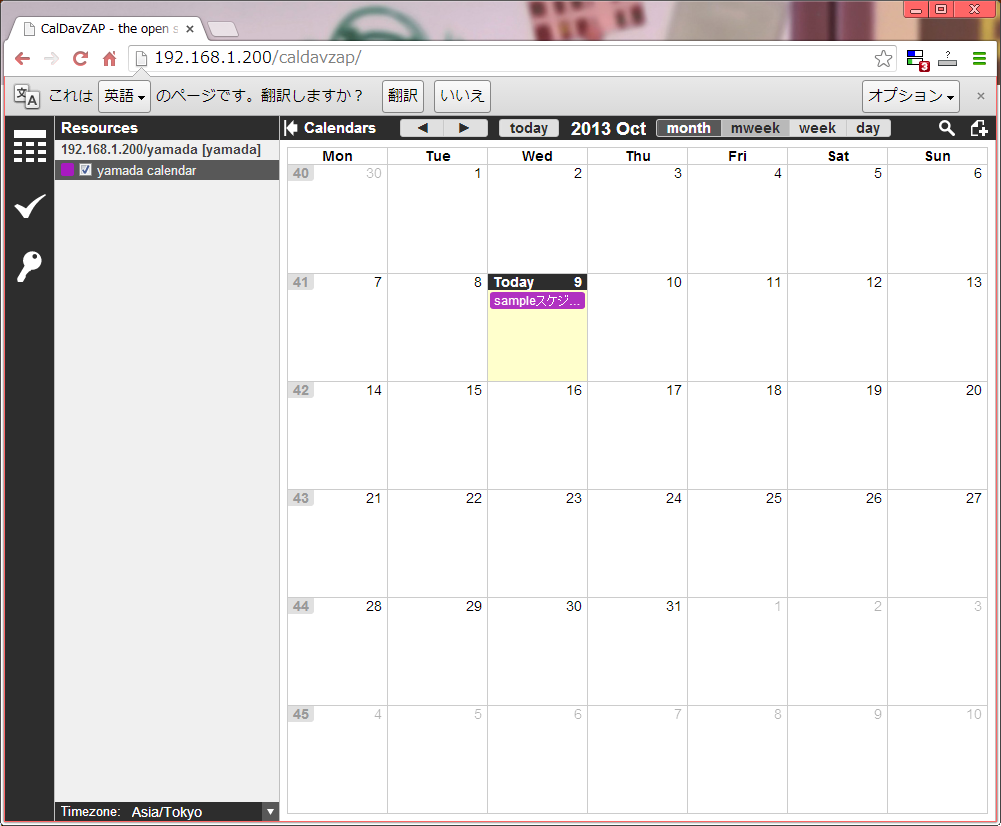
②ログインすると、スケジュール表が表示されます。
「CalDAVZAP」の使い方については、別途機会があれば紹介したいと思います。
また、日本語版がないので、自身でカスタマイズする必要があります。
日本語化できたら、そちらも紹介したいと思います。


